
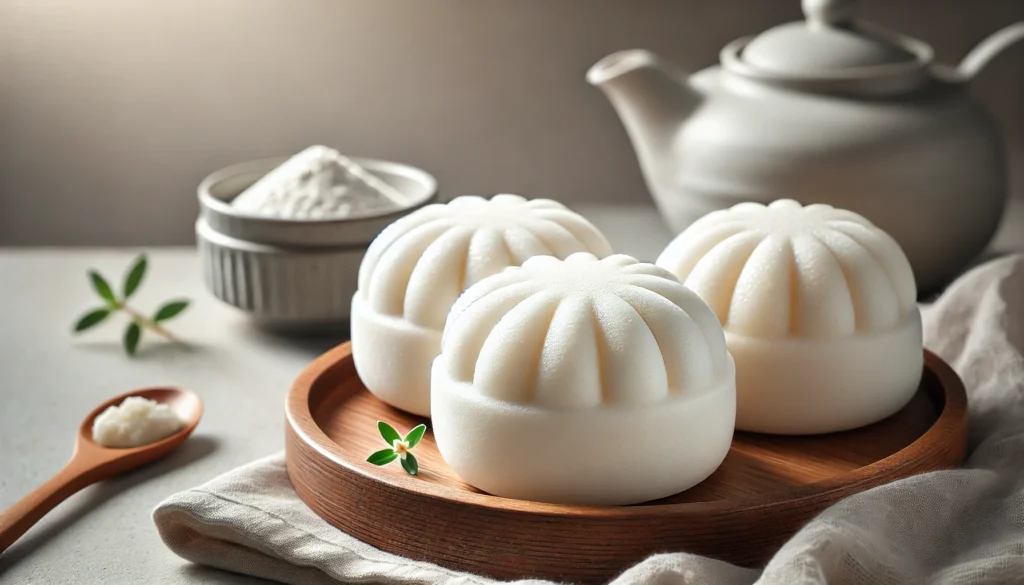
Have you ever bitten into a soft, fluffy cloud of sweetness that melts in your mouth? If not, prepare to embark on a culinary journey that will introduce you to the delightful world of puto, a traditional Filipino rice cake. But wait – this isn’t just any puto recipe. We’re going to explore a gluten-free version that maintains all the charm and flavor of the original while catering to those with dietary restrictions.
Puto has been a beloved snack in the Philippines for generations, often enjoyed as a breakfast treat, afternoon pick-me-up, or even as a companion to savory dishes. Its simple yet irresistible taste has made it a staple in Filipino cuisine. However, as more people adopt gluten-free diets due to celiac disease, gluten sensitivity, or personal choice, traditional puto recipes using wheat-based flours have become off-limits for many.
That’s where our gluten-free puto recipe comes in. By using alternative flours, we’ve created a version that’s not only safe for those avoiding gluten but also incredibly delicious. This recipe maintains the soft, spongy texture and subtle sweetness that puto is known for, while offering a new twist that everyone can enjoy. Whether you’re a long-time puto lover looking for a gluten-free option or a curious cook eager to try something new, this recipe is sure to delight your taste buds and expand your culinary horizons.
Recipe Ingredients
Let’s start by gathering all the ingredients you’ll need to make these delightful gluten-free puto. The quantities provided will yield approximately 24 small puto cakes.
| Ingredient | Quantity | Notes |
|---|---|---|
| Rice flour | 2 cups | Ensure it’s certified gluten-free |
| Coconut milk | 1 cup | Full-fat works best |
| Water | 1/2 cup | Room temperature |
| Sugar | 1/2 cup | Adjust to taste |
| Baking powder | 2 teaspoons | Gluten-free certified |
| Salt | 1/4 teaspoon | |
| Vanilla extract | 1 teaspoon | Optional, for added flavor |
| Cheese | 1/4 cup | Grated, for topping (optional) |
Ingredient Substitutions:
- If you can’t find rice flour, you can use a gluten-free all-purpose flour blend.
- For a dairy-free version, replace the cheese topping with grated coconut or omit it entirely.
- Coconut sugar can be used instead of white sugar for a more natural sweetener option.
Recipe Instructions
Now that we have our ingredients ready, let’s dive into the step-by-step process of making gluten-free puto. Follow these instructions carefully for the best results.
- Prepare the steamer: Fill a large pot or wok with about 2 inches of water and bring it to a boil. Arrange your steamer baskets or molds, lining them with small pieces of parchment paper or banana leaves if available.
- Mix dry ingredients: In a large bowl, whisk together the rice flour, sugar, baking powder, and salt until well combined.
- Add wet ingredients: Gradually pour in the coconut milk and water, whisking constantly to avoid lumps. Add the vanilla extract if using. Continue mixing until you have a smooth batter with a consistency similar to pancake batter.
- Rest the batter: Allow the batter to rest for about 15 minutes. This helps the flour absorb the liquid and results in a smoother texture.
- Pour and steam: Fill each mold about 3/4 full with the batter. If using cheese, sprinkle a small amount on top of each puto. Place the filled molds in the steamer basket and cover with a clean kitchen towel before putting on the lid. This prevents water droplets from falling onto the puto.
- Cook: Steam the puto for about 15-20 minutes, or until a toothpick inserted into the center comes out clean. The exact cooking time may vary depending on the size of your molds.
- Cool and serve: Once cooked, remove the steamer basket from the heat. Allow the puto to cool for a few minutes before gently removing them from the molds. Serve warm or at room temperature.
Helpful Tips:
- For extra fluffy puto, sift the dry ingredients before mixing.
- If you don’t have a traditional steamer, you can create a makeshift one using a large pot and a heat-proof plate or bowl.
- Avoid overcooking, as this can make the puto dry and tough.
Recipe Tips & Variations
To ensure your gluten-free puto turns out perfect every time, here are some additional tips and exciting variations to try:
Tips for Success:
- Make sure all your ingredients are at room temperature for the best results.
- Don’t overmix the batter, as this can lead to tough puto.
- If you’re using metal molds, grease them lightly to prevent sticking.
- For a more authentic look, use banana leaf liners instead of parchment paper.
Exciting Variations:
- Pandan Puto: Add 1-2 drops of pandan extract or 1 tablespoon of pandan juice to the batter for a beautiful green color and unique flavor.
- Ube Puto: Mix in 2 tablespoons of ube (purple yam) powder or ube extract for a vibrant purple puto with a delightful earthy flavor.
- Chocolate Puto: Add 2 tablespoons of unsweetened cocoa powder to the dry ingredients for a chocolatey twist.
- Savory Puto: Reduce the sugar to 2 tablespoons and add 1/4 cup of grated cheese to the batter for a savory version.
Storage Instructions:
Gluten-free puto is best enjoyed fresh, but you can store leftovers in an airtight container at room temperature for up to 2 days. To reheat, steam for 2-3 minutes or microwave for 15-20 seconds.
Nutritional Information
While the exact nutritional content may vary depending on specific ingredients and portions, here’s an approximate breakdown per serving (assuming the recipe makes 24 small puto):
| Nutrient | Amount per Serving |
|---|---|
| Calories | 70-80 |
| Carbohydrates | 15-18g |
| Protein | 1-2g |
| Fat | 1-2g |
| Fiber | 0-1g |
| Sugar | 4-5g |
Please note that these values are estimates and may vary based on the specific brands of ingredients used and any variations in the recipe.
As I take a bite of this warm, fluffy gluten-free puto, I’m transported back to my grandmother’s kitchen, where the sweet aroma of freshly steamed rice cakes would fill the air every Sunday morning. While her recipe used traditional wheat flour, this gluten-free version captures the same comforting essence that made puto such a beloved part of my childhood.
Creating this gluten-free puto recipe has been a journey of discovery, blending traditional Filipino flavors with modern dietary needs. The result is a snack that’s not only delicious but also inclusive, allowing more people to experience the joy of this classic Filipino treat.
I encourage you to try this recipe and experience the magic of gluten-free puto for yourself. Whether you’re following a gluten-free diet or simply looking to expand your culinary repertoire, these little steamed cakes are sure to bring a smile to your face and warmth to your heart.
Don’t hesitate to experiment with the variations suggested or come up with your own unique twist. And once you’ve mastered this recipe, why not explore other gluten-free adaptations of traditional Filipino desserts? The possibilities are endless!
Remember, cooking is about more than just following a recipe – it’s about creating memories, sharing love, and bringing people together. So gather your ingredients, fire up that steamer, and get ready to fill your kitchen with the irresistible aroma of freshly made gluten-free puto.
We’d love to hear about your puto-making adventures! Share your creations on social media and tag us, or leave a comment below with your thoughts and any variations you tried. Happy cooking, and may your gluten-free puto be as light as air and sweet as a Filipino summer day!
Disclaimer: This recipe is based on information available up to 2019. While we strive for accuracy, cooking methods and ingredient availability may have changed since then. Please use your best judgment and adjust as necessary. If you notice any inaccuracies, please report them so we can correct them promptly.
